
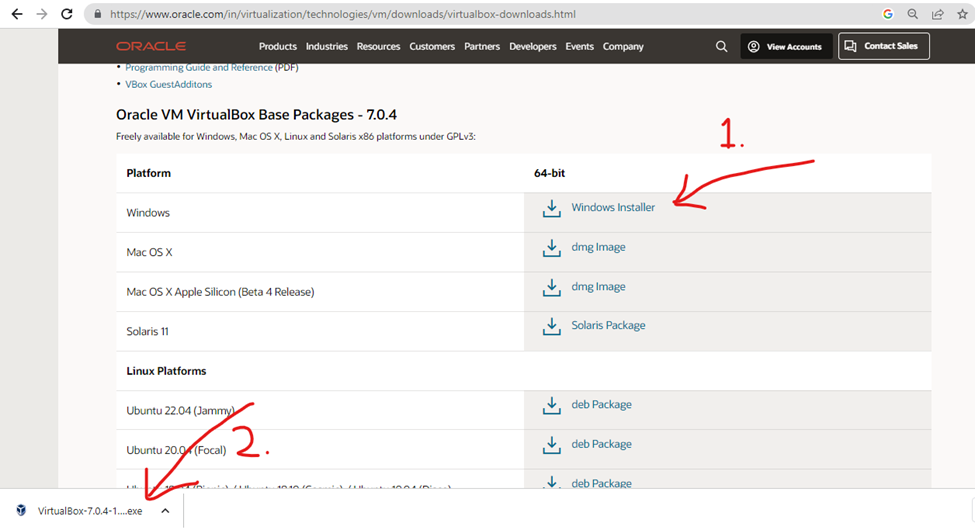
1. Download & Install Oracle Linux from the Link:
https://www.oracle.com/in/virtualization/technologies/vm/downloads/virtualbox-downloads.html
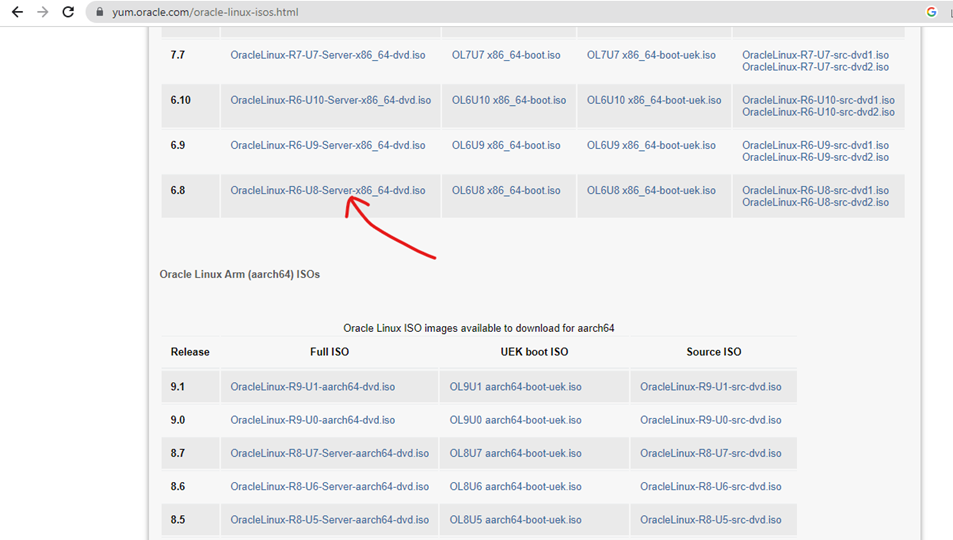
2. Download any ISO file from the link:
https://yum.oracle.com/oracle-linux-isos.html
I have downloaded 6.8 version iso
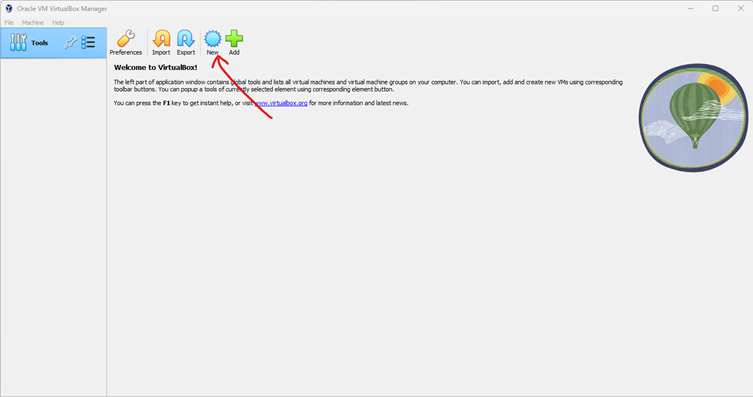
3. Let’s create the Linux machine using the same ISO.
Click on New for creating new virtual machine.
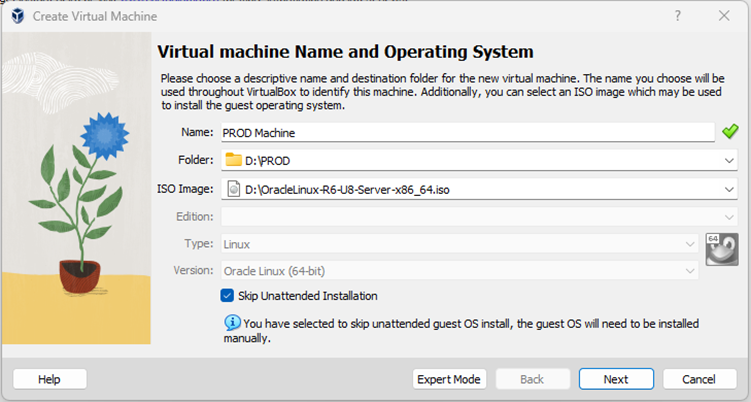
4. Now Put Name and create a folder naming PROD or any other name as per your requirement.
In my case my system D drive has enough of space, so I created a folder naming PROD and download the ISO image in same drive. I have Selected ISO image which I downloaded.
Note: Make sure you select Skip Unattended Installation. Click Next.
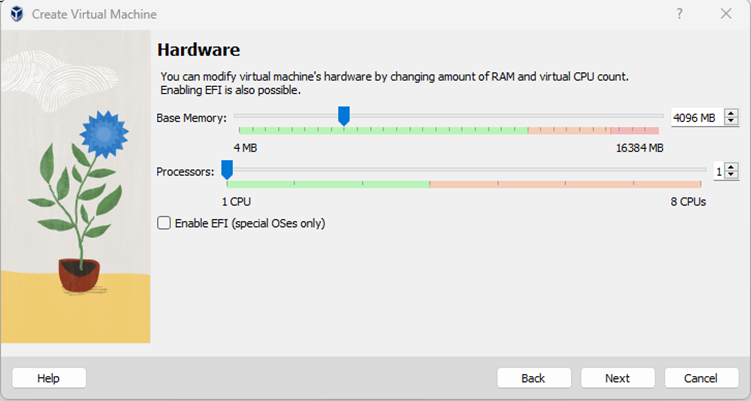
5. I have 16 GB ram in my system so I am giving 4 GB(4096 MB), you can gives as per your system resources.
Click Next
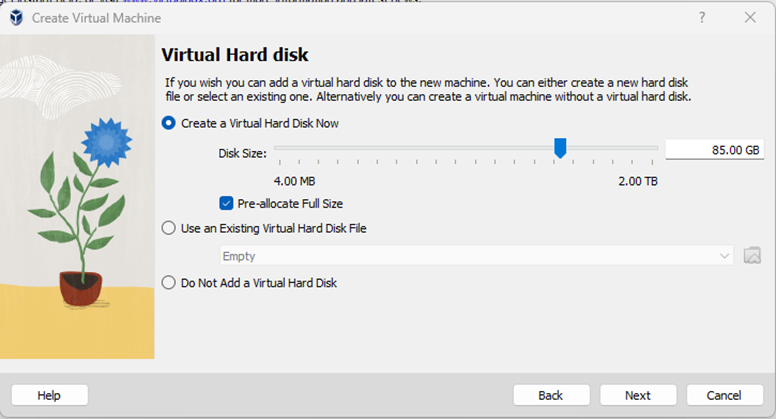
6. Now give Hard disk size you want to assign to your machine. Select pre-allocate Full Size.
Click Next.
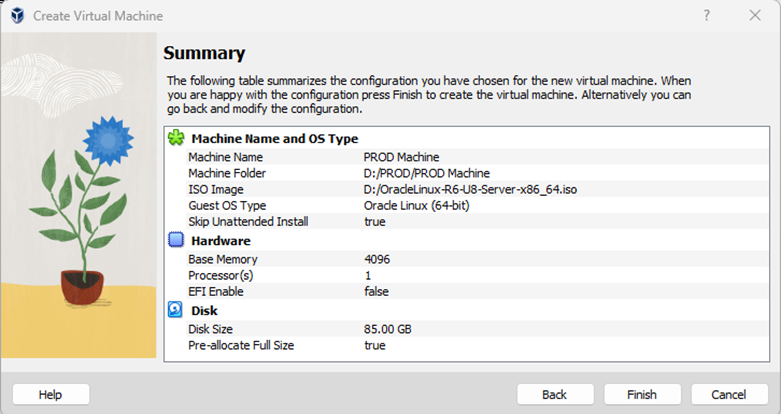
7. It will show the summary of machine click on finish.
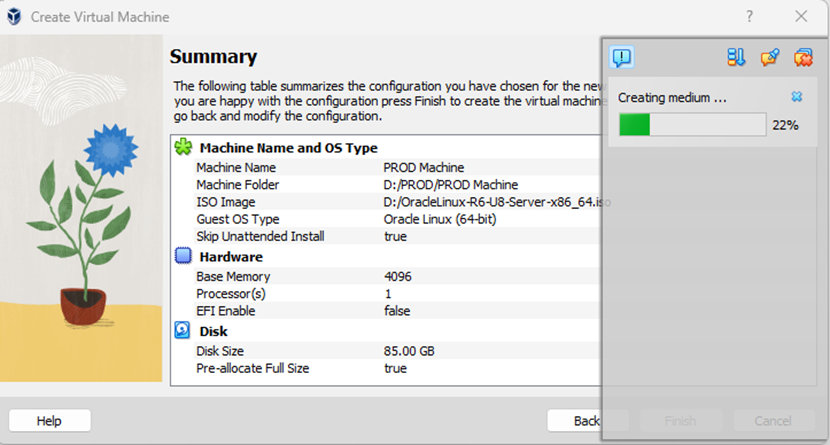
8. It will take couple of minutes to create the machine. Progress will show as per below snap.
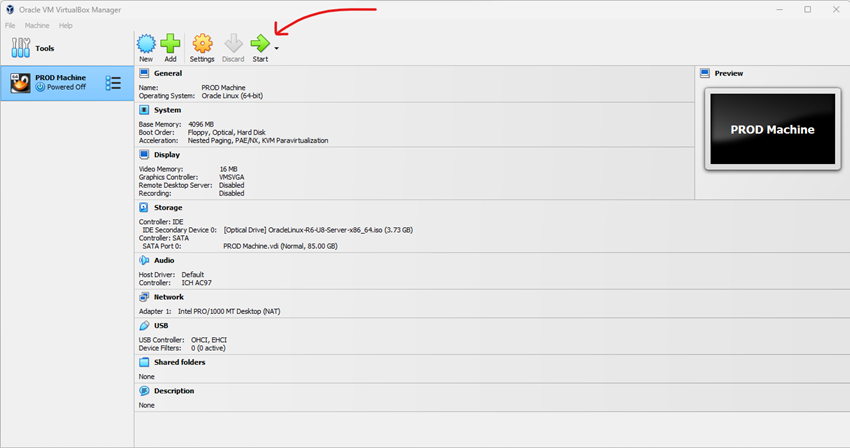
9. Once created it will show as below snap. Click on Start.
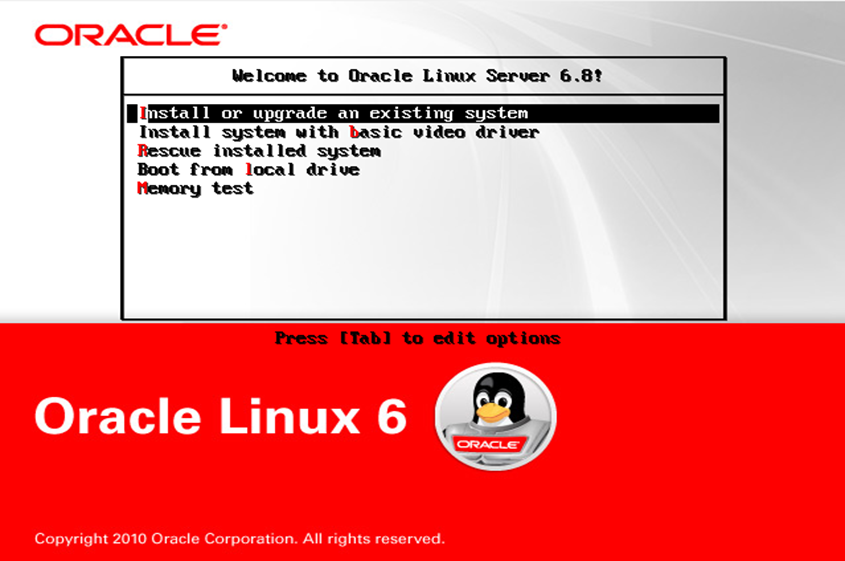
10. Now Select Install or upgrade an existing system. Press Enter
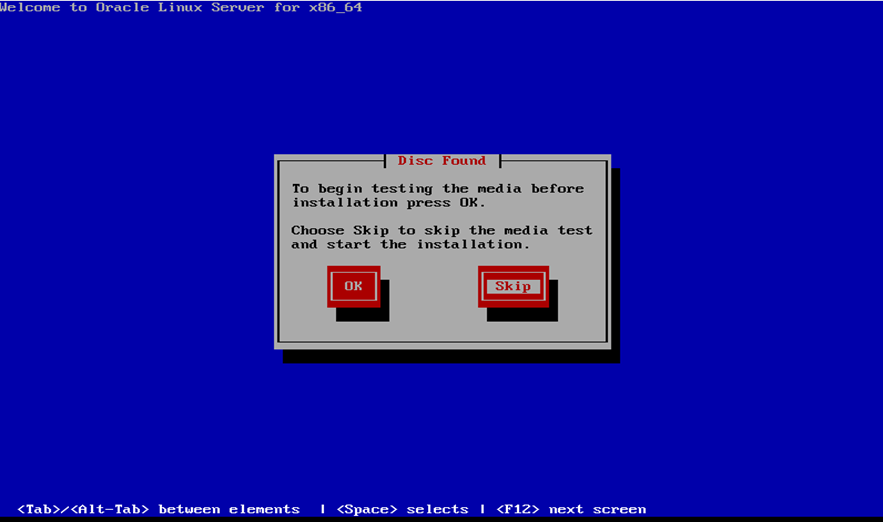
11. Select Skip and Press Enter
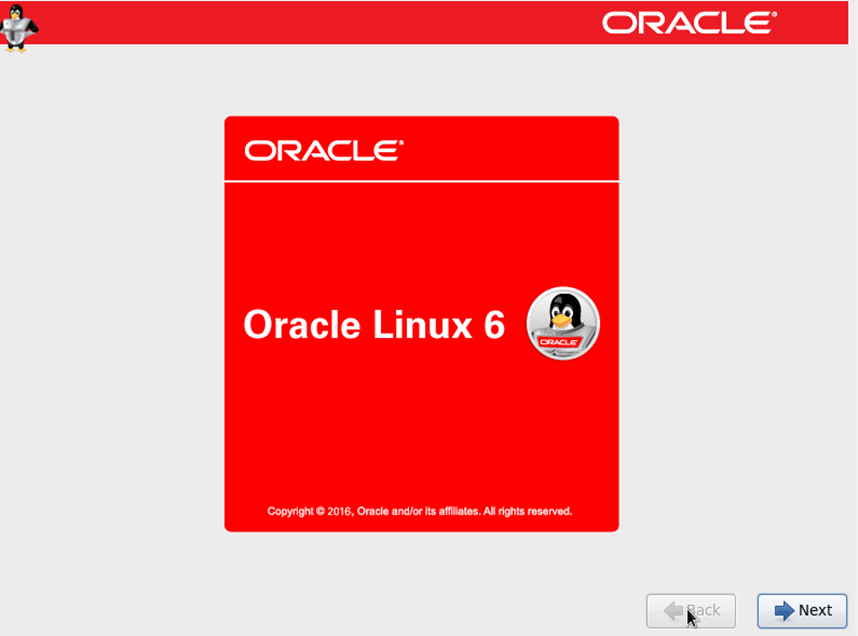
12. Select Next
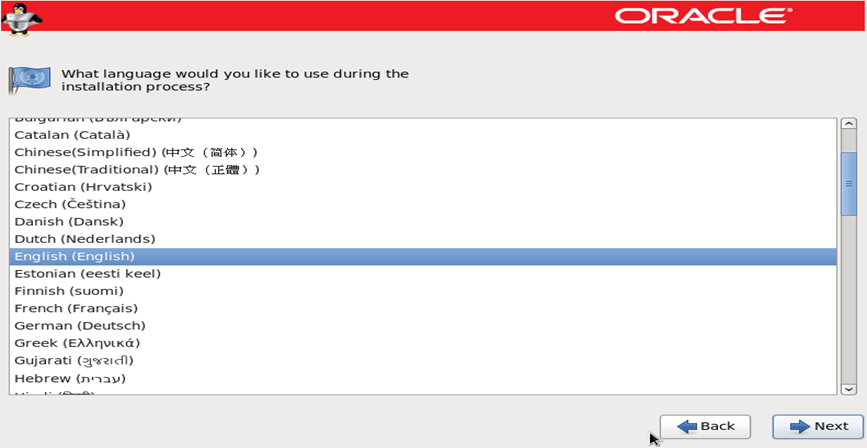
13. Select English and Press Next
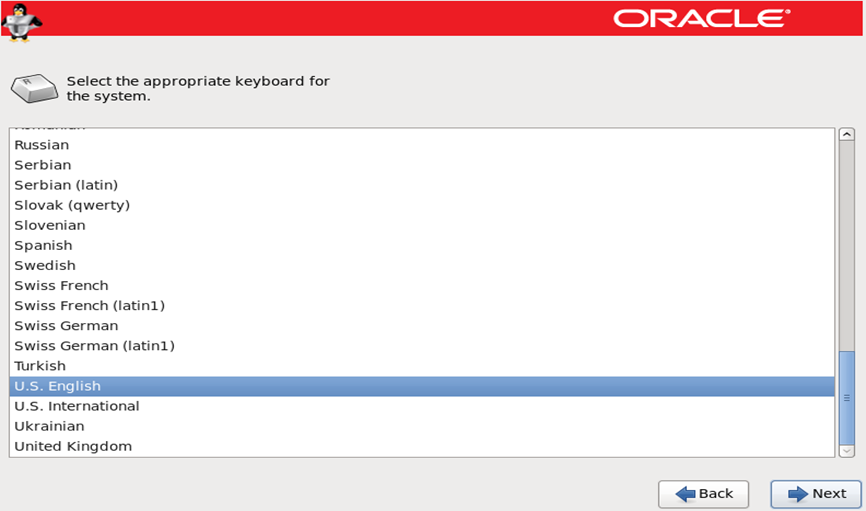
14. Press Next to go with default option highlighted.
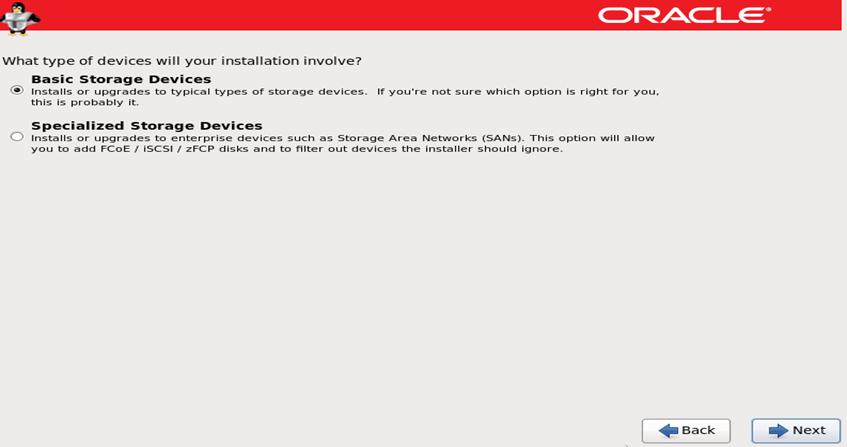
15. Select Basic Storage Devices and press Next.
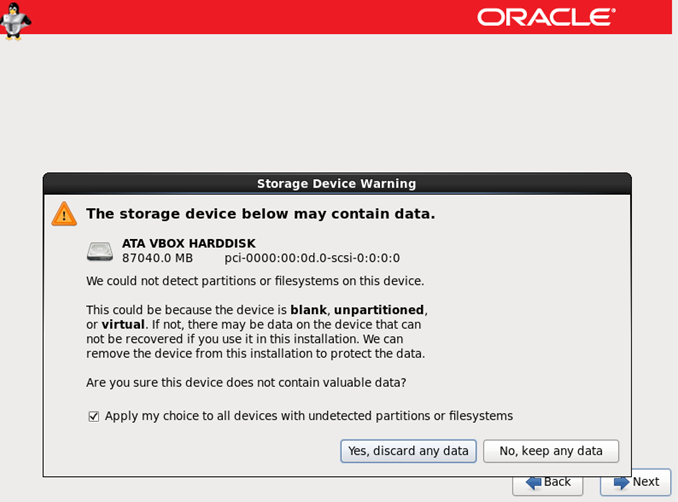
16. Select Yes, Discard any data.
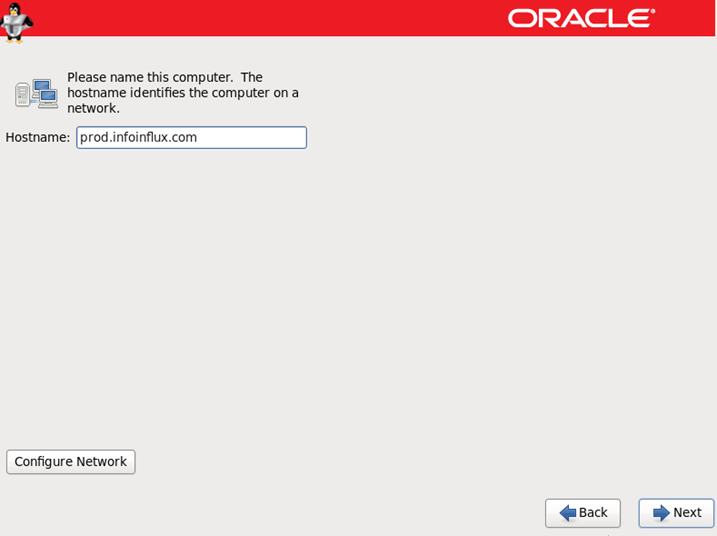
17. Put hostname I am putting prod.infoinflux.com press Next.
18. Select Time Zone and Press Next.

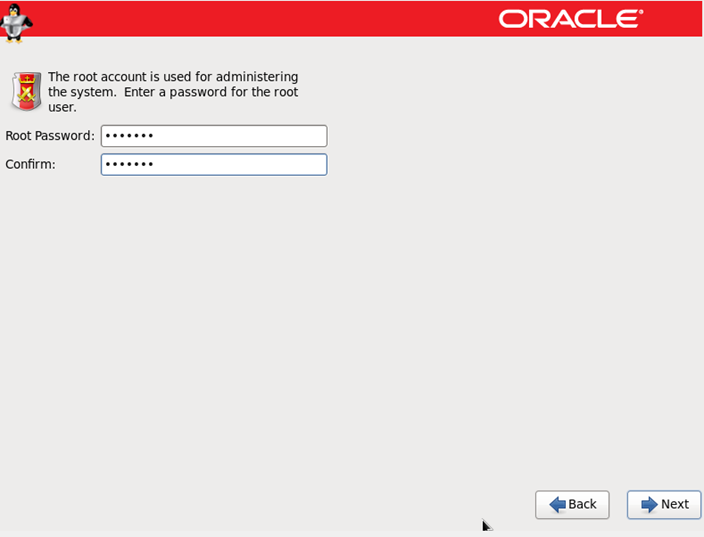
19. Put root Password
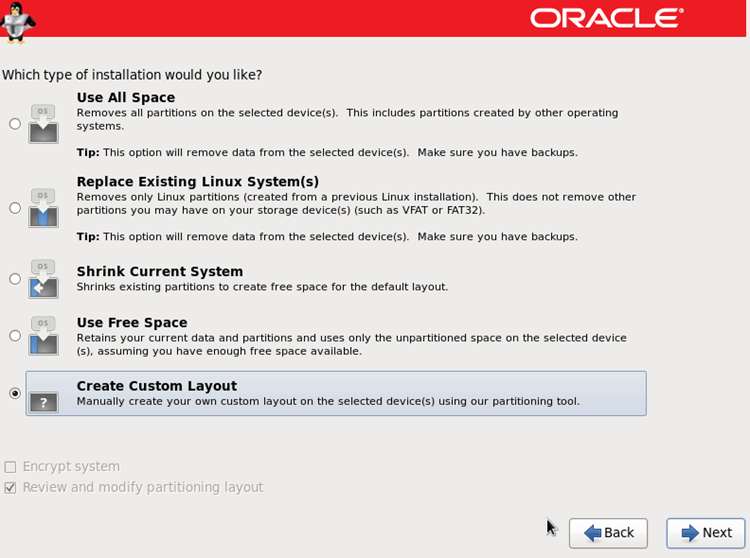
20. Select Create Custom Layout and Press Next.
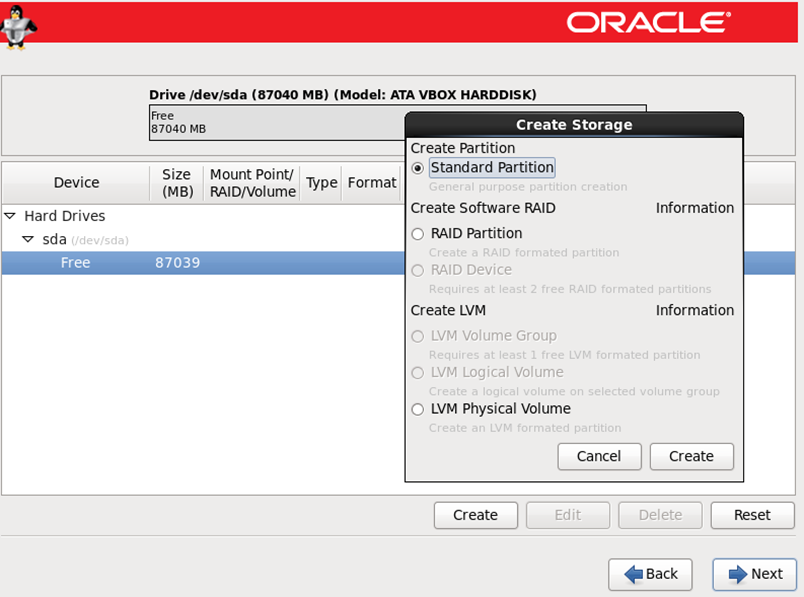
21. Press Create and Create Standard Partition
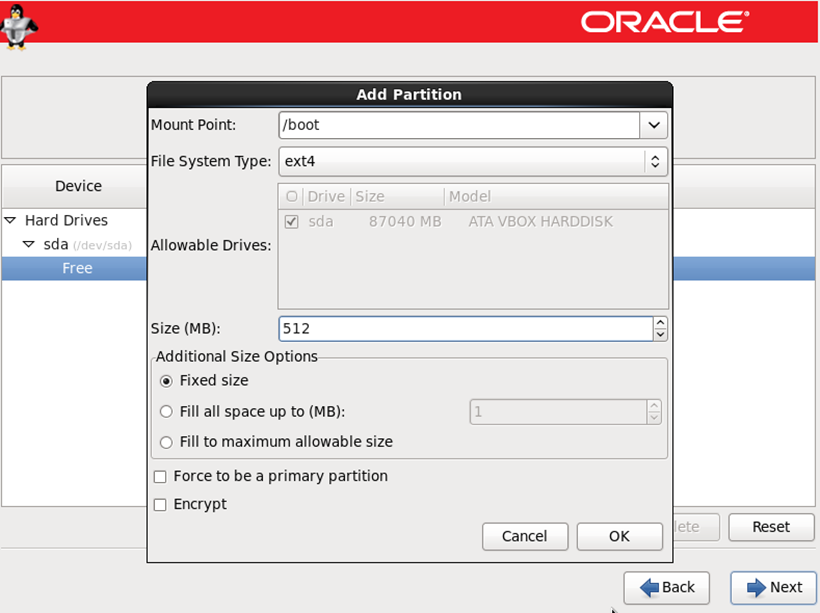
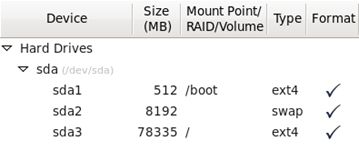
22. Select mount point /boot and give 512 mb size.
23. Create another standard partition

24. Select File System Type: swap.
Swap size taken double the size of RAM provided to the system. In our case RAM give to system was 4GB so swap size given here is 8GB.

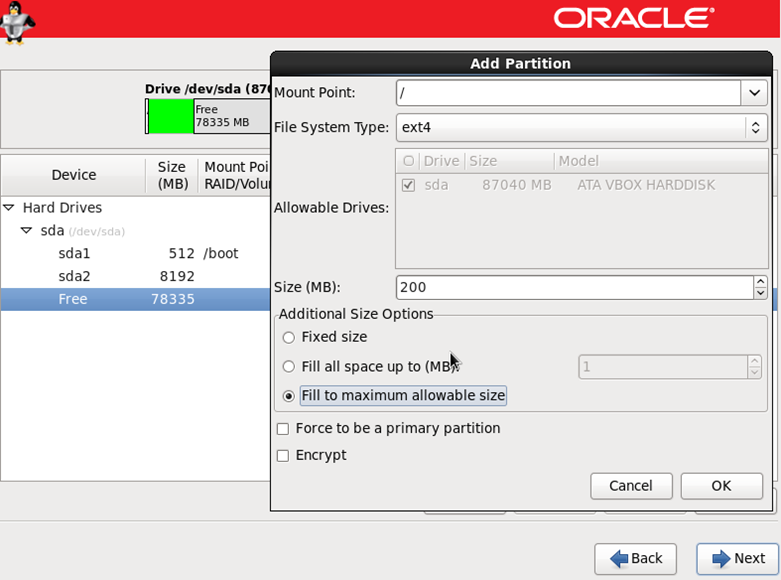
25. Create another partition for root that is / and select fill to maximum allowable size.
This will assign allover left space to /
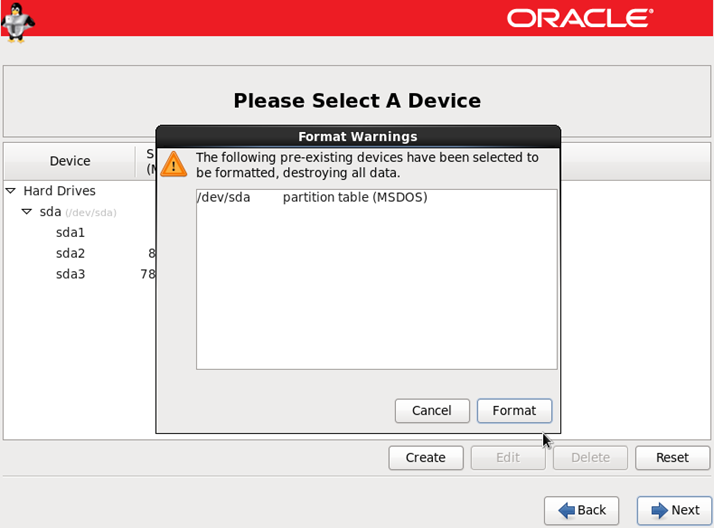
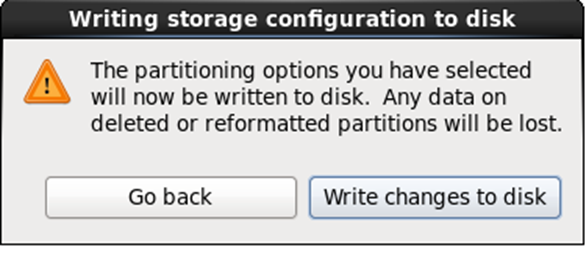
26. Click Next and Format Select Format and Press Enter. Select Write changes to disk.
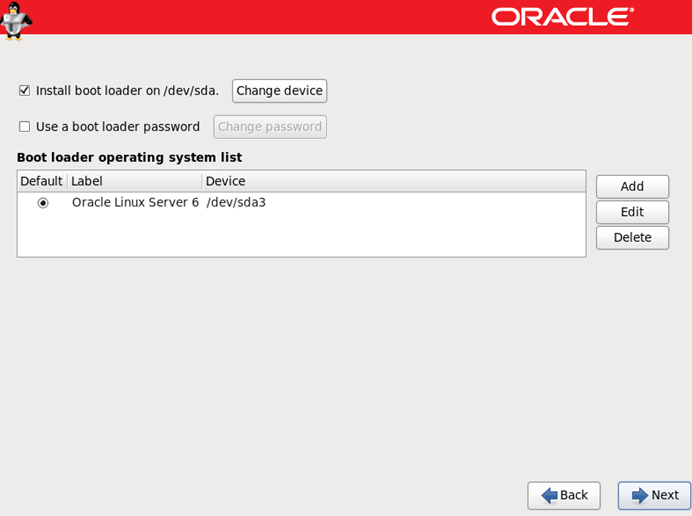
27. Select Next and Press Enter.
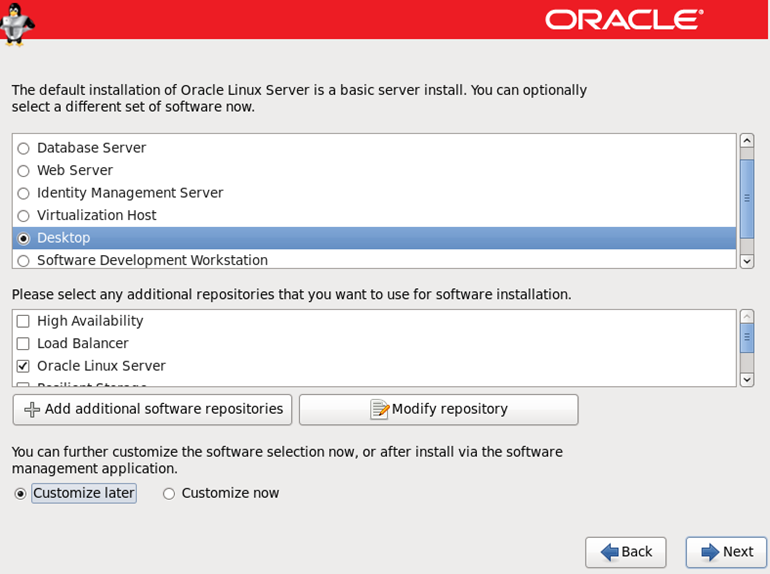
28. Select Desktop option otherwise it will install without GUI. Press Next
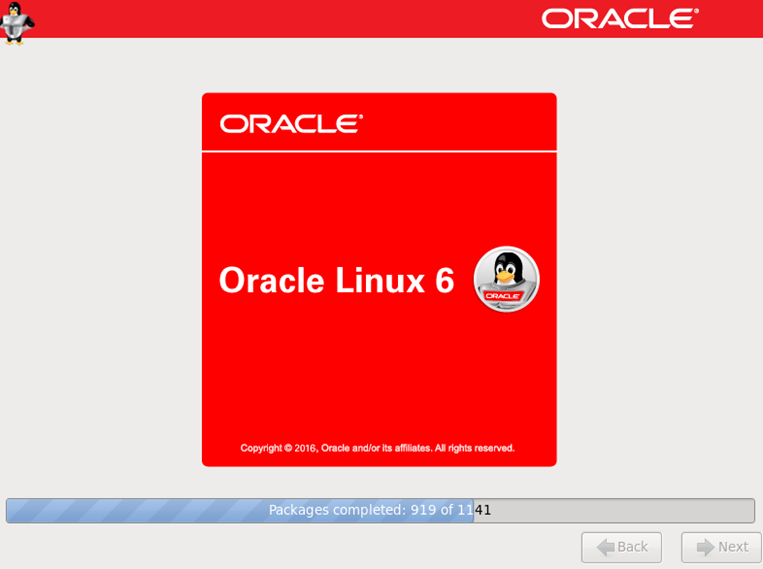
29. Now it is installing the Oracle Linux 6 OS
30. Once installation is complete it will ask for reboot. Select Reboot and press Enter.

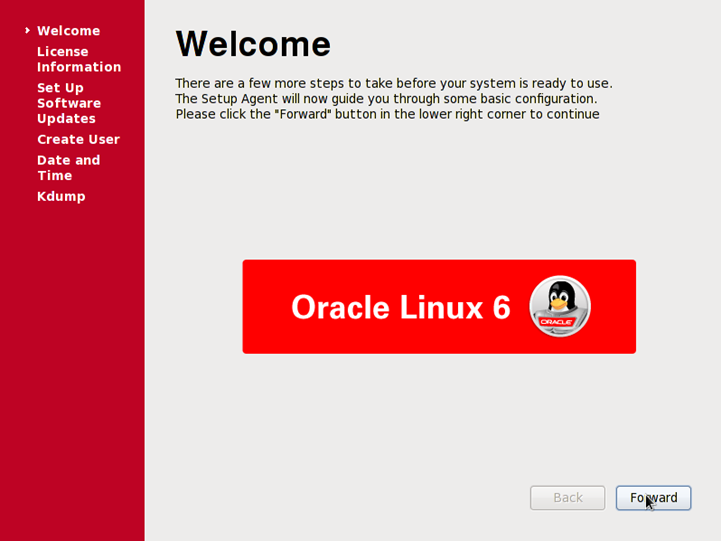
31. After Reboot this screen will come up and press forward.
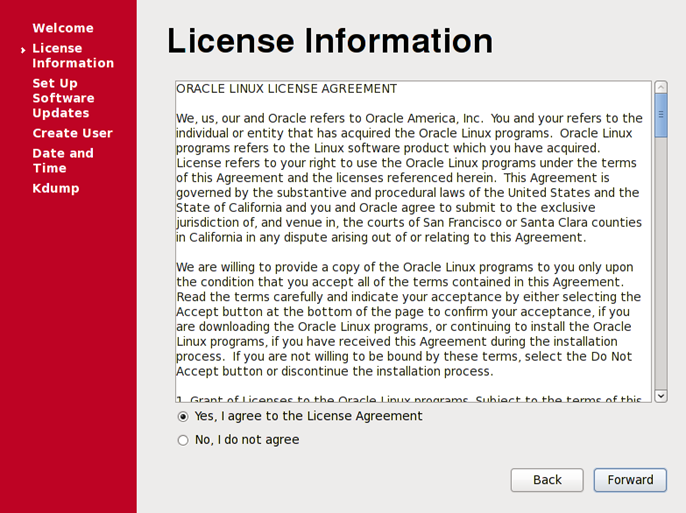
32. Agree the License Information and press Forward.
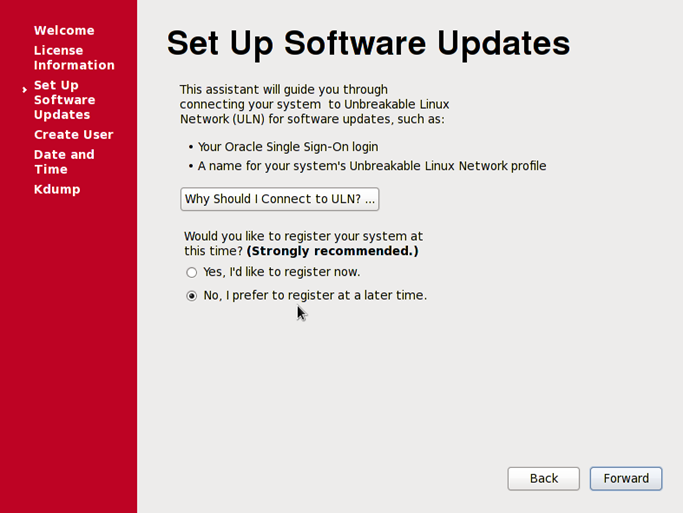
33. Select No, I prefer to register at a later time and press forward.
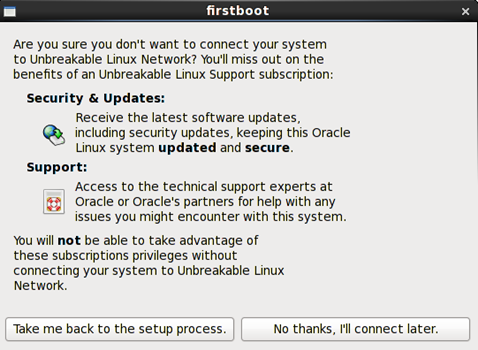
34. Select No thanks, I’ll connect later.
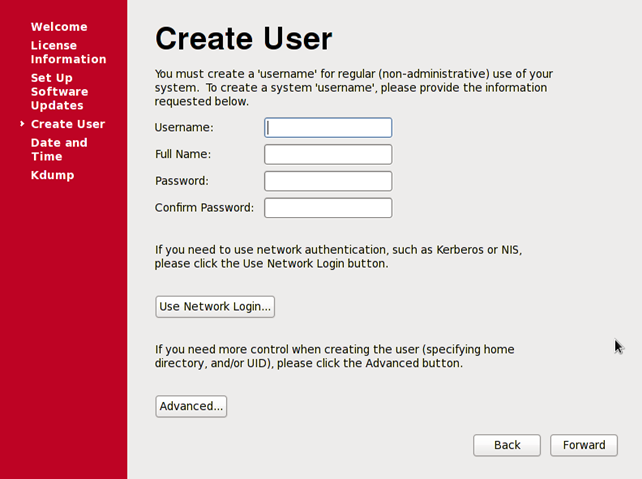
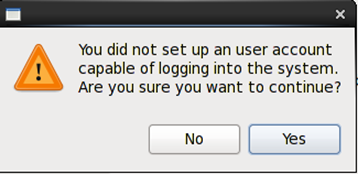
35. In this Create user as per your requirement or you can add user afterwards.
I am proceeding without any user creation. Press Forward. Then Click Yes
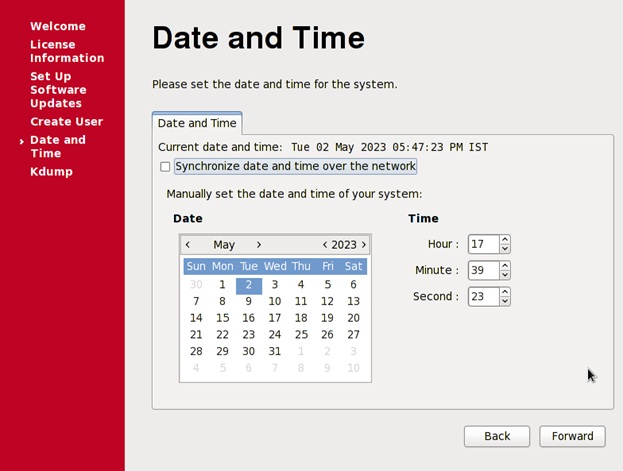
36. Set Date & Time. Press Forward.
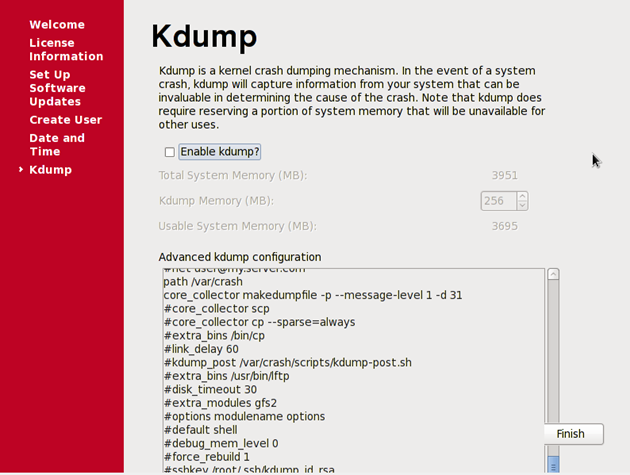
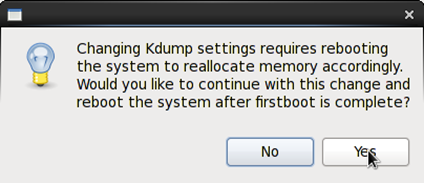
37. Unselect Kdump as it is not required. Click on Finish.
Click on Yes and it will reboot the system.
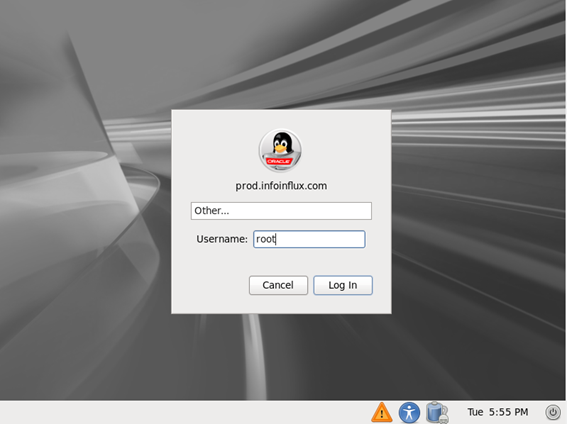
38. After reboot put username as root and put root password to log in the system.
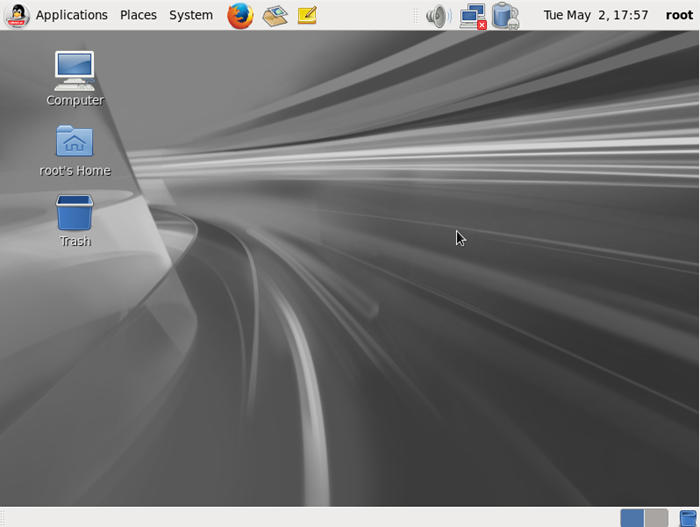
39. Oracle Linux 6 is installed on VM Virtual Box.
40. Enjoy…!!